
One of the struggles our clients tell us about is finding an easy way to collect images for use in their posts. In the past, we had recommended a good DSLR camera and that is still the best solution. However, smartphone camera technology has come a long way and now folks with newer Android or iPhone 6 or newer devices can take high-quality images with a little practice. For web purposes, images taken with these devices can do a great job.
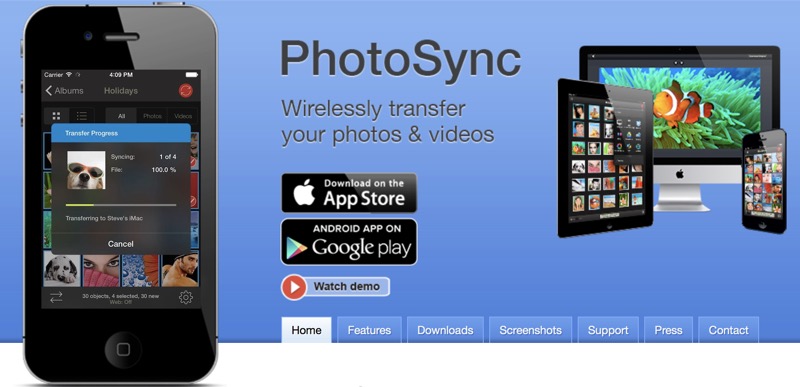
The problem has been finding an easy way to pull these images from devices and organize them properly. We’ve heard everything from clients e-mailing images to themselves to using text messaging. While there are apps that work with various cloud services, they all leave something to be desired. We think we have the perfect solution: PhotoSync.
PhotoSync to the rescue
PhotoSync is an Android and iOS app that allows users to easily share images between devices such as iPads, iMacs and PCs. More importantly, it allows one-touch transfer to your favorite cloud storage services, such as Dropbox, Google Drive, OneDrive and Amazon Cloud Drive. More advanced users can use FTP and WebDAV to share directly to an own in-house NAS.
When PhotoSync is configured properly, uploading devices to the cloud is as simple as opening the app, selecting some images, and pressing and holding the upload button for 1 second. You are done. The images upload to a designated folder and are organized in a variety of user-defined ways.
Easy configuration
In our example, we will configure PhotoSync to work with Dropbox. (There are many other options for where you want your images to end up. The configurations of most of these services will be very similar to what we are outlining for Dropbox.)
It is important to note that this is the setup on iOS devices. It may vary slightly on Android devices.
Step 1: Install the app on your device. It is called PhotoSync by touchbyte GmbH.
Step 2: After going through the initial new-user slideshow, click the gear icon at the lower right.
Step 3: Click Configure and then click Dropbox.
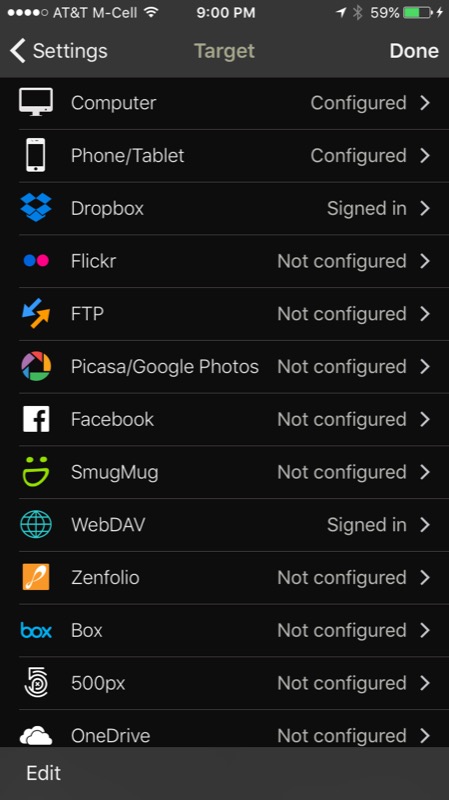
Step 4: Authorize your Dropbox account (I believe that you need to have the Dropbox app installed on your device already).
Step 5: Assign your Destination Folder. This is the folder where you want your images to end up. We used “photosync.” The app will automatically create the folder for you if it does not already exist.
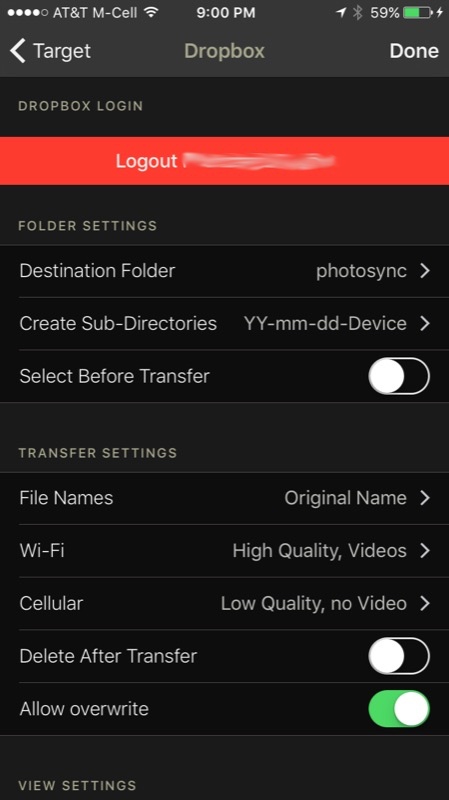
Step 6: We recommend that you create sub-directories. This will allow you to organize your images better, based on a variety of user-defined parameters. Year-Month-Day-Device seems to be a good option, since it will organize by date and by who’s device uploaded it. This way, everyone on your staff can have the ability to upload images and each person’s images will be separate from other employees’ images.
Non-step: You have the option of designating the sub-folder before transfer, but we advise against this. You want the upload process to be as easy as possible. It is much easier to sort any individual projects into sub-folders on a desktop.
Step 7: Under transfer settings, we suggest using your best judgment. For the purposes of 1sixty8 media, we generally do not need any images larger than 1,200 pixels wide.
Step 8: Hit Done. You should now have configured Dropbox sync properly.
Step 9: Click the Gear again.
Step 10: Click Quick Transfer.
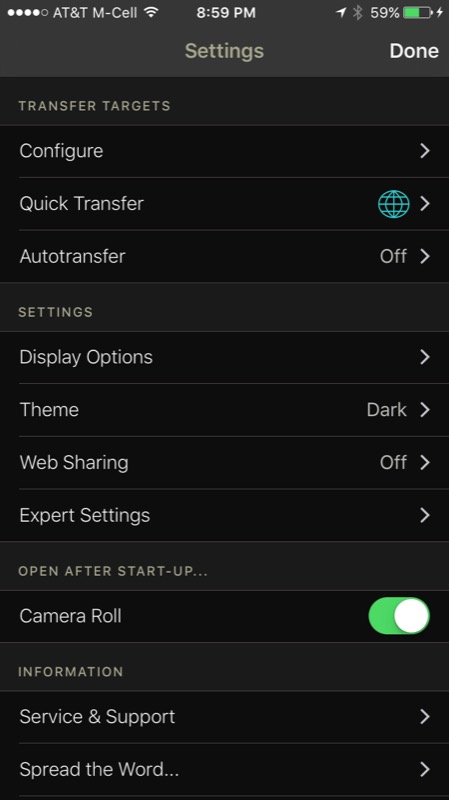
Step 11: Turn on Quick Transfer.
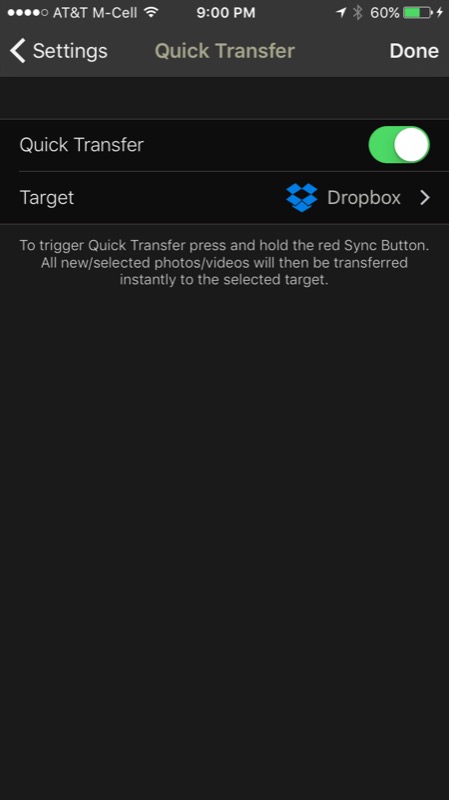
Step 12: For Target, select “Dropbox.” This will allow for simple, one-touch uploading (see below).
Step 13: Click Settings. You should be back at the main settings screen.
Step 14: Make sure that in Open After Start-Up, Camera Roll is turned on. You are done.
 One-touch uploading is beyond simple
To use PhotoSync, simply open the app, select the files that you want to upload, and press and hold the red button in the upper right. Game over – your photos are off to the cloud!
Easy organization
We recommend coming up with a Dropbox structure that works for you. Here is a screenshot of what we use at Mobile Edge. Employees are responsible for organizing their own folders into sub-folders with some type of identifying information. We chose to go with the categories, year, make and model for the sub-folder name.
These folders can simply be dragged into either the Quick Post folder or the Build Post folder, depending on the anticipated scope of the content. This way, you will have an organized archive of your work. When you need a topic for a quick post or build, post you will have plenty of content to work with.

Don’t forget the Desktop Companion
Be sure to install the desktop companion for iMac or Windows. This will allow you to easily move other images from your desktop to your phone or the other way around. It’s a useful feature that is sure to come in handy.
Please let me know if you have any questions. If you have any insights on how you use PhotoSync, please be sure to share them in the comments.
Leave a Reply